The sky is a big and so finding a faint object even as large as the Full Moon can be a challenge. With a little preparation though, you can find objects time after time even if your memory isn’t exactly encyclopedic.


So to being with, whilst still in the warmth of your home, install Stellarium (http://stellarium.org/en_GB/) which is available for most platforms. Next decide which objects you want to find in the night sky. In this case I’m going to use the Triangulum Galaxy M33 in Triangulum. So open up Stellarium, on the lower left menu change the date to the time (the clock icon) you expect to observe and use the search (the magnifying glass icon) in the same menu to find M33. You can zoom in to see it, but how are you going to find it.
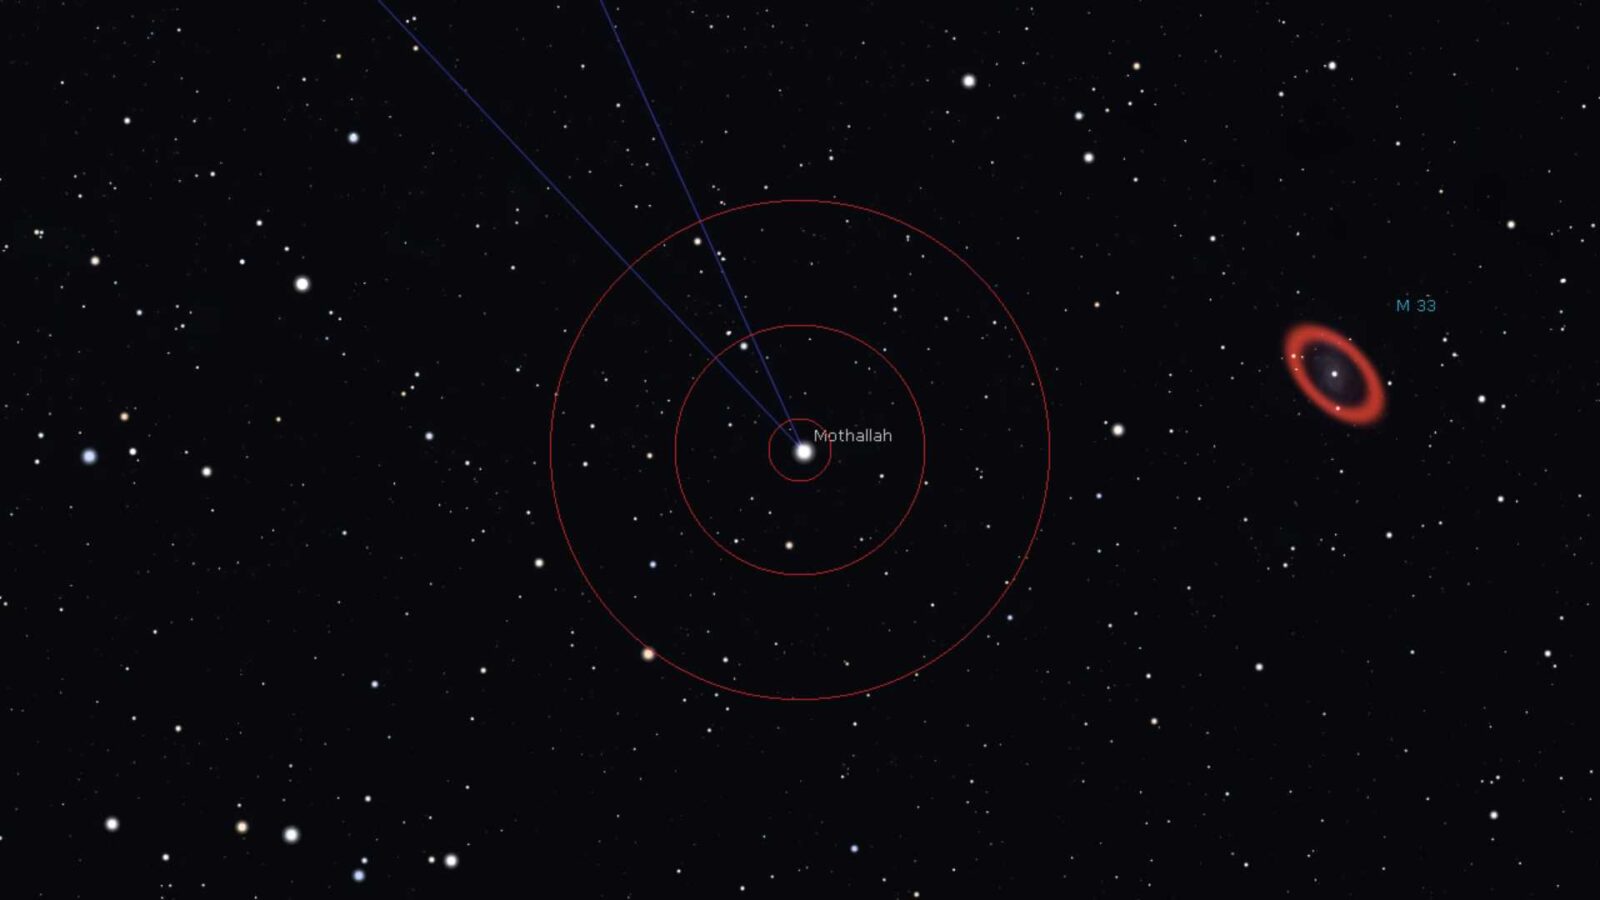
Ok, so we’re going to prepare a chart for you to follow using a Stellarium and a graphics program – here I use FastStone. In Stellarium go to the top right corner and click the Telrad view. This places 3 concentric red circles in the centre of your screen. The outer one has a diameter of 4° of sky, the middle of 2° and the inner of 0.5°; the outer shows you typically what you see through a small finder scope and the centre what you see through the low power eyepiece of a medium sized telescope – about the same width as the Full Moon. Centre the Telrad on circles on the bright star Mothallah in Triangulum.
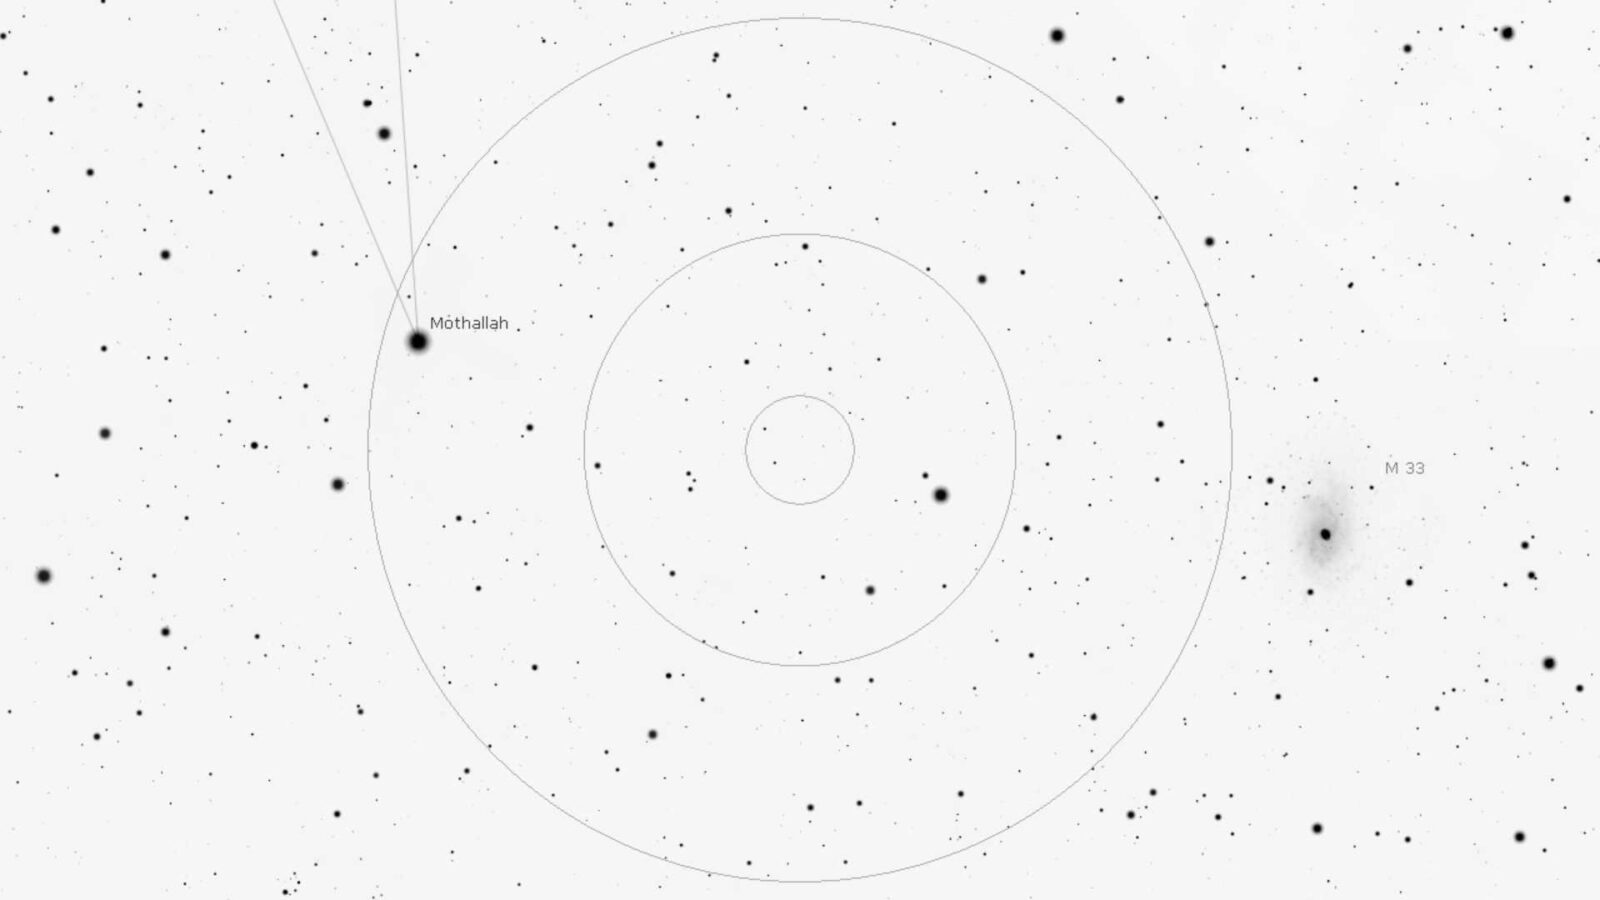
Zoom in until the outer circle is touching the top and bottom of the screen and both Mothallah and M33 are still visible on the screen. This is going to be your chart to help you star hop from Mothallah to M33. The problem is the tiny white dots on a black background are hard to see in the dark and its going to use a great deal of black ink. So click the Prt Sc button (on Windows) to capture the screen and then paste it into a graphics package of your choosing. The package only needs to be able to support Inverse as a transformation function. So Paste and Inverse and you should now have a usable chart you can print out. You may wish to protect from the damp by laminating it.
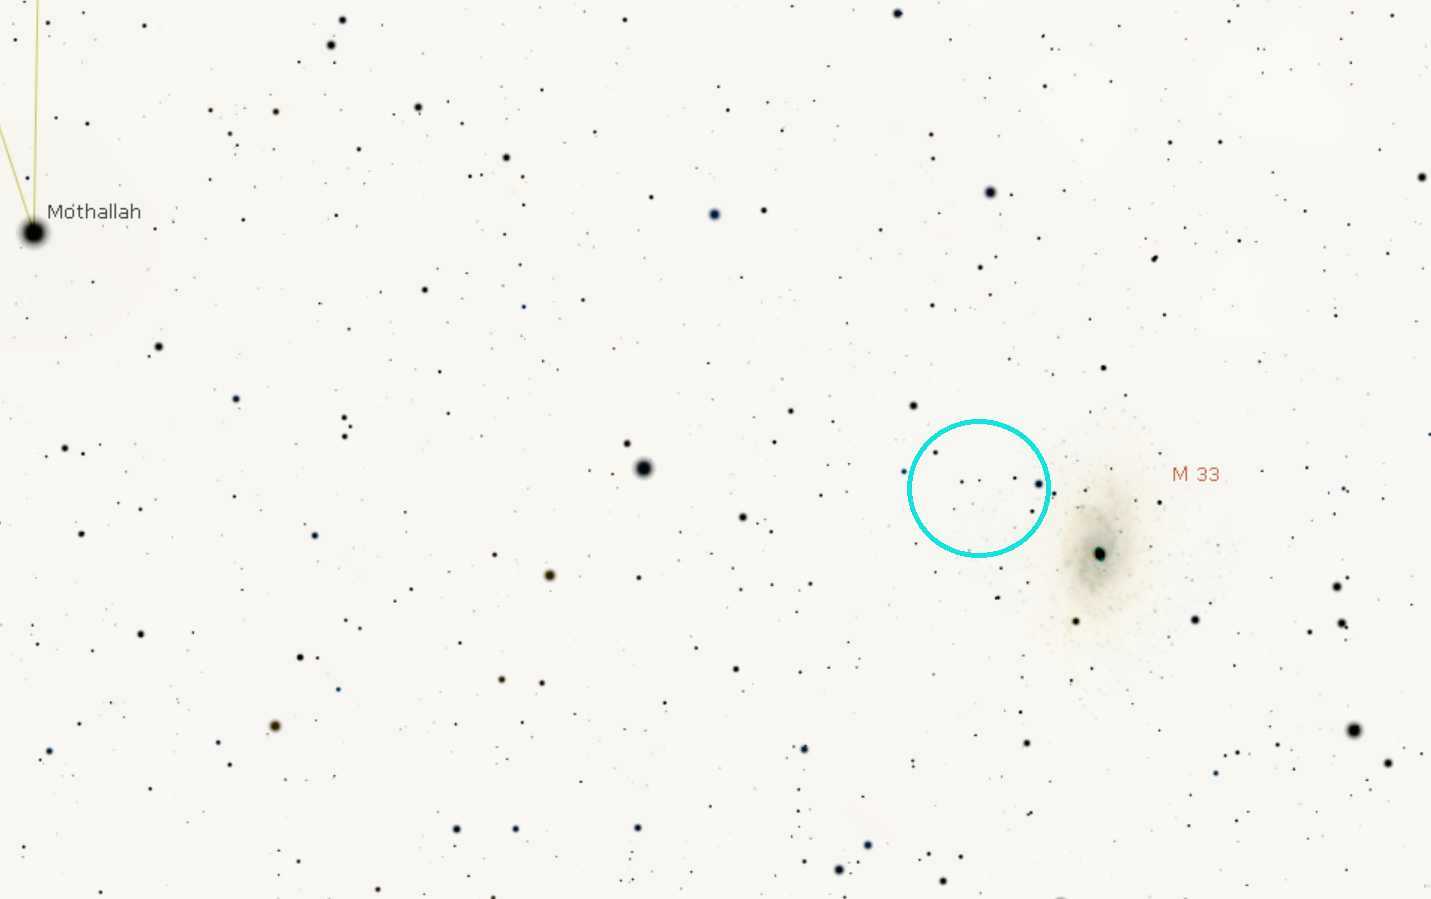
So now you are prepared, visually find Triangulum in the night sky. Move the telescope to get Mothallah in the centre of the finder scope field of view. You should notice the brighter stars in you chart through the finder scope and start using the slow motion controls to move in the direction you know M33 is on the chart. If the stars are too dim in the finderscope, look through the main scope with a low power eyepiece such as a 28mm and follow the stars you see in the eyepiece on the chart. It is slower going using the eyepiece but equally successful. If you lose you way, have a look in the eyepiece and match the stars that you see with those on the chart. Here I’ve circled it in blue and we are just about there.
You can prepare for all the new objects you wish to find each night in the same way, just find a nearby star which you know how to find; in this case, it was the pointy end of Triangulum. Screen capture the star and object together with the Telrad circles on there too so you know the scale. If you do choose to laminate them, you can develop a whole guide to finding objects. You can use the same technique for planets and comets but because they move they aren’t so reusable. Happy hunting.
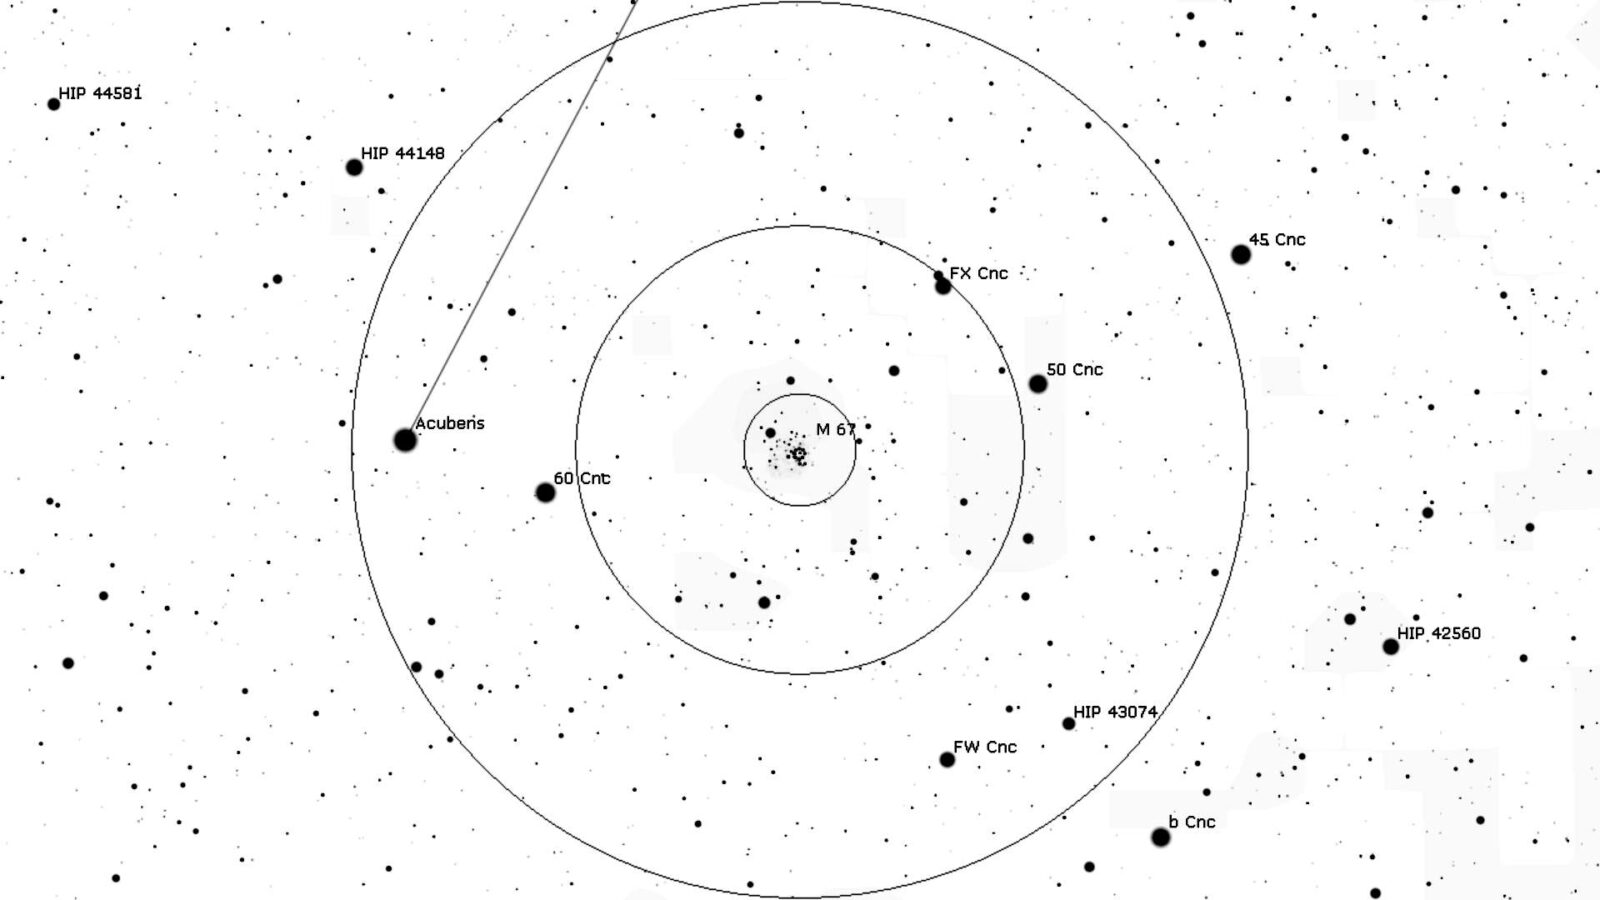
Examples of Messier charts